Tuesday, December 31, 2013

Isabelle Release Party

Myagrocks is holding an online release party to discuss Isabelle and her collection. I'm traveling and can't link to it, but the URL is myagrocks.weebly.com.

Happy New Year's Eve from Elerie and me! 

Wednesday, December 25, 2013

Paper Doll World on Myagrocks!

Paper Doll World was chosen as one of Myagrocks's Great Sites of 2013! Thank you!

A sneak peek photo that I shared for the post:


It's a little blurry, so I hope to share some better photos here soon.

Sunday, December 22, 2013

A Solution to the Doll Vacation Dilemma

Christmas and the winter break are almost here, and many people (perhaps including you) are planning to go on vacation. Herein lies the quandary for paper doll aficionados - bring my doll in the event of an awesome photo opportunity, or leave it at home to ensure it doesn't get lost? I know from experience the pain and frustration of losing your favorite doll on vacation, but I can never resist bringing my dolls places in hopes that I can get some nice photos to share here. So for this year's vacation I'm trying something new, and I hope you find this idea useful as well. 


I made a new doll specifically to take on trips. She's cute enough that I know I'll enjoy photographing her, but I won't be heartbroken if she gets lost. This way, I can compromise both my goals - taking fun photos without losing my favorite dolls. I'm not sure about her name, though; she might be Elerie until I can think of something better. 

So that I can get some variety in her looks, I made Elerie the bare necessities to take on this trip. It'll be a fun challenge seeing how many outfits I can pull together. Here's the one she'll be wearing to travel (I'm not taking this one at the airport because I got enough strange looks the last time I photographed dolls in a public place).


It seems a little stereotypically French, but the hat is nice (inspired by a piece by Janie Jumps) and you know how I am about that cape. In my opinion, Elerie doesn't look half bad.

When it comes to storing Elerie, I'm keeping her inside my phone case. Some other strategies that work are attaching a paper closet (search under tutorials - I'm having trouble linking it) to a hair clip and wearing it, or putting the doll and items in a well sealed plastic bag in your pocket (the plastic bag protects the doll should you forget to remove it before washing the clothing). 

Are you bringing a travel doll on your trip? How are you planning to store and photograph it?


Thursday, December 19, 2013

Simplest Tutorial Ever

This is not a formal tutorial, just a quick but very useful trick that I just discovered today while working on yet another surprise for you. Regular tutorials will hopefully be up soon.

 Have you ever completed a doll and then realized that you didn't like the eye or lip color? Believe it or not, you can change it even after the doll has been tape-laminated. Here's how to do it. My apologies in advance for blurry photos - it gets dark so early these days.


Lay out your doll, and choose the new colors. I decided to change her eyes from hazel to blue, but this would work with any color, even if the new one is lighter (except if the new one is yellow, but I would be scared by a yellow-eyed doll so it doesn't make much difference to me). Caveat: this only works with markers.


Very carefully, with the very tip of the marker, color in the eyes. This picture is terrible because I tried to zoom in as close as possible, but it should be sufficient to show you the difference between the colored and plain eyes.


Let dry. I hold the face against a lit lightbulb for a few seconds to set the color because it's faster, but that's pretty dangerous so I don't recommend it. A much safer alternative is to leave the doll in a sunny area for about five minutes. 

The best part of all is that if you don't like it or want to change the colors, all it takes is a slightly damp paper towel or makeup removing wipe or what have you, and the new color comes right off. You can experiment with making dolls with blank irises and change the eye color whenever you feel like it.

Hope you enjoyed this quick trick. Let me know how it works for you!

Wednesday, December 18, 2013

My Darling Clementine

You may already have heard the news from Doll Diaries but I'm so excited that I'm going to share it anyway: Clementine is coming to Casa Paper Doll!


It'll certainly be different to have a vinyl doll around! I can't wait to photograph her and try my hand at making paper clothes for non-paper dolls. Thank you Doll Diaries and A Girl for All Time for this amazing doll, and thank you for all the kind comments you left on my previous post. You're the best!

Monday, December 16, 2013

Paper Doll World + Doll Mag Take Two!

Do you remember the tutorials I wrote for the Doll Mag a while back? Well, we've teamed up together again to provide a new set of tutorials, this one for a set of holiday dresses inspired by historical fashions. Click the photo below to see the first one!


I hope you enjoy these tutorials as much as I did making them. Thank you Bella and Lulu for this wonderful opportunity!

Tuesday, December 10, 2013

Anniversary Q&A

Thank you for your questions! I'm always glad to hear from you, and I hope you find these answers satisfactory.

Will you have another contest?

I've got one planned, but I'm not sure when it'll happen - it all depends on when I'll have a few minutes to put together the prize.


Who was your first paper doll?
To tell you the truth, it's been so long that I can't remember. The oldest dolls that I've still got, however, are Gertrude and George - you can see them here.


Do you have any plastic dolls?
Not yet - I'm thinking about purchasing the American Girl of the Year for 2014, but I'm not fully decided. Do you have any doll recommendations?

In general, though, I prefer my paper dolls. They're cheap, portable, easier to store, and give me so much more creative range than plastic dolls. So, aside from that one doll purchase, there won't be too many plastic dolls appearing here.

Who is your favorite American Girl doll?
Which kind do you mean - historical, My American Girl, Girl of the Year, or custom doll? You know what, I'll just give an answer for each:
Historical: Caroline (those eyes) or Cècile.
MyAG: #30 or #55. I like #33 as well, and #38's wig. #46 is also cute.
Girl of the Year: Jess and Kanani for sure, probably Lanie, maybe Chrissa, McKenna, and/or Saige. Still holding out for the African-American girl of the year.
Custom: Colette Denali's Miko, no question. So gorgeous. I'd get her in a heartbeat if she was a stock doll. In general, though, Ms. Denali has fantastic taste in custom dolls; Hanabi and Fiona are also lovely.


What doll that you made is your all time favorite?
That's tricky, but I'm going to go with Alia. She's got such a fun expression and her coloring is nice. Of course, it doesn't hurt that she's based on Miko, whom I've already gushed about above.

Are you going to sell paper dolls? You should totally do that!
Yes! You can see more on that here.

Do you have any American Girls? 
If you're referring to the dolls manufactured by American Girl, the answer is not yet (see above). If you mean paper dolls based on American Girl dolls, then pretty much all of them except for Holly, Meredith, Quinn, Juliet, Aisling, Madeline, and Fiona. (Whew!)

Which doll was the hardest to make? 
Hmmm... I'm going to go with Juliet, my first successful Ellowyne. That face sculpt is beautiful, but so hard for me to draw!

What inspired you to make paper dolls? 
At first, I made paper dolls because I wanted the dolls that they were based on and I couldn't afford them.  That's still true, but even if I had a plastic doll I would still make paper dolls, because it's such a great feeling to know that you can make your own dolls and have as much creative control as you want, something that's not quite as possible with a plastic doll.

If you could have any doll who would they be? 
Colette Denali's Miko (see above). I think I'm a little too obsessed with her, but she is too gorgeous. My dream is to one day own a custom doll just like her. I also love "MetroGirl" Ellowyne and "Mist, Green Tea, and Me."


And that's it! If you have any other questions, feel free to ask in the comments and I'll do my best to reply.

Monday, December 9, 2013

The Secret Project Revealed!

Happy 1 year anniversary to Paper Doll World! I honestly can't believe that people are still reading this site, but I'm so grateful to everyone who follows, comments, and spreads the paper doll love. Instead of reminiscing about this past year, we're moving onward and upward, starting with the revealing of the secret project that I've kept up my sleeve since August. Are you ready?


That's right, pretty soon you'll be able to purchase handmade paper dolls and items from the official Paper Doll World online store!

The 2013 winter line is going to include about 3 (maybe more, depending on the time) different doll and wardrobe packs, a food set, and perhaps a furniture set. Prices will range from $3 to $5, so it's super affordable, and the dolls will remain blank so you can customize them however you wish. If you're interested, I may be able to do a few custom orders, but those will be a little more pricy.

A sneak peek at one of the doll and outfit packs. Of course, the final version will be fully colored.
My plan was to have the grand opening and launch of the 2013 winter line today, but there were some technical snafus and the products aren't going to be on sale for a little while. The problem is that I want to sell the dolls and items as PDFs that can be instantly downloaded, but instead of that being a free service like I thought, it will end up being $7 to $50 a month, depending on how many items I sell. If enough of you buy from the Paper Doll World store, maybe I can break even, but I don't want to put that kind of pressure on you. My current plan is to sell the products as PDF files, but wait until the payment registers in Paypal and personally email you the file. It won't be an instant download, but it should be pretty fast. If business picks up, maybe I'll upgrade to the instant downloading service. Your thoughts?

I'm so excited to finally share this with you! I'll post more pictures as time permits, but in the meantime, what do you think of this new aspect of Paper Doll World?

Friday, December 6, 2013

Upcoming Q and A - Ask Now!

In honor of the one-year anniversary of Paper Doll World, I've decided to have a Q&A. If you have any questions about making dolls or pretty much anything (minus personal questions, of course), comment by December 8 at midnight and I'll do my best to answer them all in an anniversary post. Thanks for reading, and ask away!

Tuesday, December 3, 2013

Make Your Dolls Look Alive

Do your dolls have eyes without pupils, just flat color? Many of mine do, and it makes them look lifeless and zombie-like. Here's a trick to fix that with a doll who's already completed and tape-laminated. 


You'll need some white-out (a white-out pen with a thin tip is best, or a toothpick of applying white-out from a bottle), and a black pen with as thin a tip as you can find. I recommend a gel or drawing pen, but   any good pen that writes smoothly should work. 


Apply a tiny bit of white-out to the doll's eyes. This will be the catchlight. Try to apply as little as possible - you can never have too little when doing this. Wait a second to let it dry.


Use the pen to draw around the white-out to form the pupil. Try to keep as much of the eye color as you can while also not obliterating the white-out. Wait a few seconds to dry.

That's it! It's easy, fast, and works like a charm. I hope you found this useful, and if you have any questions or tutorial requests, I would love to hear them.

Thursday, November 28, 2013

Happy Holidays

From Alia, P1/Isabella, Tesla, Rani, and me: 


Happy Thanksgiving and Chanukah!

Tuesday, November 12, 2013

The Biggest Doll on Display!

"Petra" is finally finished and on display!


I finished coloring it all in a few nights ago and thought about sharing pictures then, but I was so disappointed in the way it turned out that I decided against it. So many things went wrong when I was coloring it that I thought it wasn't worth posting about, but the next day when I was preparing my display board I realized that I didn't hate it as much as I thought.


The coloring on her face and neck is certainly not my best, but I really like her hair. It's one of the few happy accidents of this piece, and it doesn't fully succumb to the "gradient everywhere" theme I seem to have adopted.


And here is the board on display! What do you think of the finished product?

Monday, November 11, 2013

GOTY 2014 Prototype 1

One of my favorite things about paper dolls is that you don't have to wait for the official release to get the doll you want. (Granted, it's not the actual physical doll, but for me it's good enough). When the photos of the 2014 Girl of the Year were leaked in October, I decided to try making my own version.


I don't know if I'm going to end up keeping her, because she's not based on the best-quality images, so I'm calling her Prototype 1 for now. 

L-R: Alia, P1, Tesla, Rani
A group shot with everyone minus Fiona and Aisling. Tesla's sweater is new - it's based on the sweater from the Liberty Jane outfit "Piccadilly".  Seen separately, the girls' faces seem pretty similar, but in group shots the differences are obvious. Their hair is different too, and not just in color variation; P1's hair is the only one done in colored pencil rather than marker. You can see how it adds some dimensionality to her face. Which is your favorite?


The gold shoes in the "meet" outfit look better with the dress than the gold boots that AG sells with the Sparkle set. As evidenced by the outfit she comes in, P1 looks good in pink sparkly clothes. She can wear pretty much anything and look all right, but I thought that the combination of gold sparkles on shoes and dress was fortuitous.


Winter hasn't officially arrived yet where I live, but it's certainly chilly enough to justify boots. The capelet was inspired by the one made by L'Atelier de Sitara, and it's a nice piece of outerwear in that it looks cozy but doesn't obscure the shirt beneath. And, of course, I had to include a photo with the puppy Lulu, who's only been on here once. I need to get a dog-walking photo series together at some point.


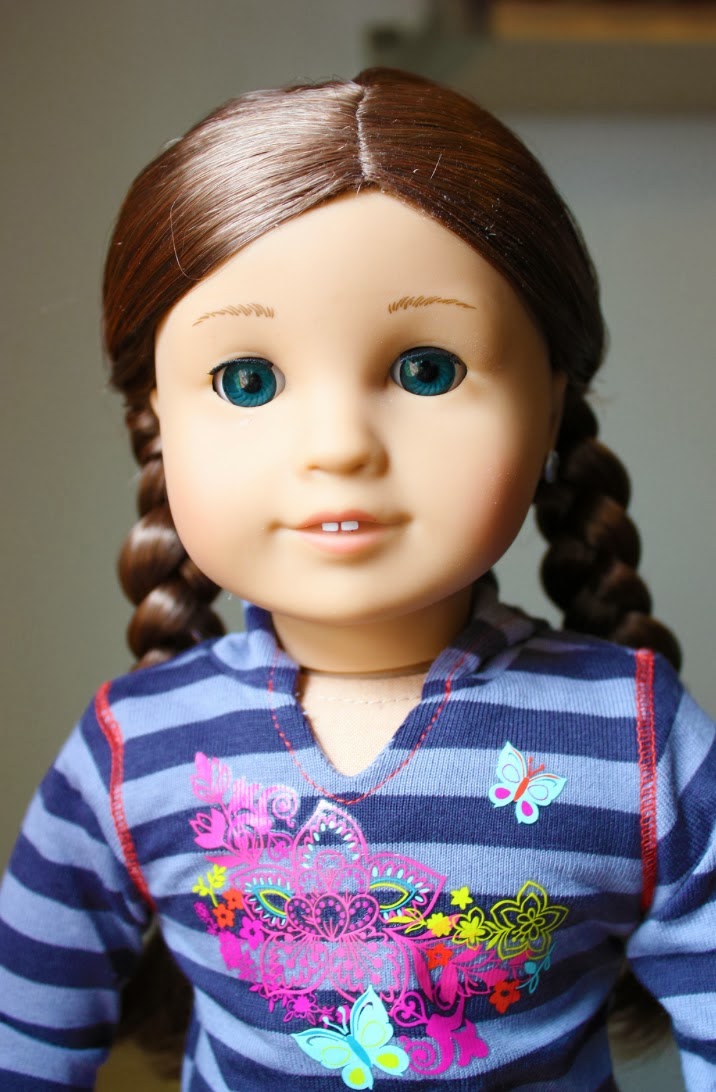
The most distinctive aspect of the 2014 Girl of the Year is her dyed hair. This isn't perfect, but isn't hideous, so I'm going to keep it as is until I can get better photos.

Have you made your own GOTY 2014 doll? How did she turn out?

Tuesday, November 5, 2013

The Biggest Doll

Thank you all so much for your kind comments! I really appreciate your good wishes, and will be sure to share the photos when I make my purchase.

Since I don't have a tutorial ready to go yet (though I can't wait until I can get back on that), I thought I'd share some pictures of my newest paper doll, the biggest one I've ever made.


Whereas on average, most of my dolls are three inches tall, this doll is a little over five times that. She's most likely not going to be a "play" doll, since she's so big - I made her for an art display at a library. The piece is tentatively named "Petra," so that's what I'm going to call her throughout this post.


Her face is based on the Ellowyne head sculpt. It isn't perfect, but I like it well enough. Drawing Ellowyne faces is insanely hard (at least for me), but drawing her face wasn't as difficult as drawing Juliet's. I wonder if it was because her face is so much larger?


You might recognize the bunny shirt on the left as one I made for the three-inch dolls. The shirt on the right is not nearly as good (I struggled for ages to come up with a design I didn't hate, and I still don't really like it), but it will do for now. Any ideas for a replacement?


By far my favorite part of the set is the arm tattoo. I'm not really into tattoos in general (just a personal preference), but I wanted to try something new and I'm really happy with the results.

Of course, this is still a work in progress - I still need to color everything in - but I thought you might like to see something a little different. What are your thoughts?

Sunday, October 27, 2013

News and Previews

Just thought I'd pop in for a moment to confirm that I'm still alive and haven't thrown out my paper doll collection (cue Cher from Clueless: "as if!"). Here's the scoop on what's been going on while I've been absent:

1. Remember when I said I'd be back to blogging full time by early November? I'm not so sure about meeting that deadline anymore - too much typing, writing, and sketching caused a repeated strain injury to my wrist, with some carpal-tunnel-like symptoms. I've got a wrist brace, and I'm planning to get back to work on paper dolls ASAP, but don't be surprised if there's a delay.

2. In happier news, my big secret project is almost done! Here's a sneak preview.


Can you guess what it is?

3. I'm working on a fun new series that will debut soon. I don't know if it will be a weekly thing or a more spontaneous feature (perhaps it will replace the Tuesday tutorials until I have time for them again). Here's a hint for the first post of the series:


Can't wait to share all the details! Check back soon for the start of the series.

What new projects are you working on?

Tuesday, October 15, 2013

Meet Daisy and Sally

While this isn't strictly part of my big secret project (which is still in the works!), I thought you might like to see some new developments in lieu of a tutorial post, for which I haven't got the time. These two have been around for a while, and I finally got a chance to photograph them for you. Introducing the new dolls, Daisy and Sally!


They're quite a bit smaller than my trio, as demonstrated in this photo of them with Tesla (trying on a new red wig). Daisy is based on Patience from Wilde Imagination (she's modeling the Garden Patience outfit and wig), and Sally is based on Wilde Imagination's Sad Sally. I'm not especially fond of the name Sally, but since it reminds me of Sally Draper from Mad Men, I'm going to stick with it for now. 


Daisy is different from any doll I've ever made, not only because of her straight bangs (which I rarely make), but because her eyes aren't permanent.


Sorry about the poor image quality - I tried to enlarge the photo but I just ended up making it blurry. I hope you can see how her eyes work in this image: the eye was cut out and a piece of paper with eyes drawn on it stuck to the back of her head. It's by no means perfect, but it means I can switch out her eye color for blue, brown, or any color I choose. Daisy is the first doll I've ever made with changeable eyes, and I'm really excited about exploring this new area of paper doll customization.


Sally doesn't have removable eyes yet. I may switch them out if Wilde Imagination makes a new version with different eyes, but for now I like the hazel eyes with her crazy orange pigtails.


Sally is the smallest doll of the group, and perhaps the smallest doll I've ever made. Here she is beside a dime so you can get a sense of her scale.

Making Daisy and Sally was a delightful challenge. I hope to show you more photos of them soon. What are your thoughts on these dolls?

Sunday, October 6, 2013

Who Wore It Best? (Melody Valerie Edition)

Melody Valerie Couture's "Ardith" dress is one of the most stunning pieces of doll clothing that I've ever seen, so of course I had to make it for the trio.
Photo from Melody Valerie Couture
Who, in your opinion, wore it best?


The combination of purple and gold is lovely with Rani's hair, but looking at the photos I'm not sure if the gold earrings were too much.


I thought the pairing of elegant dress and sneakers was an unexpected and fun combination, but there are only so many times that this dress can be worn like that without looking trite. Any ideas for attractive dress shoes?


Tesla's hair is nice, but I wonder what other hairstyles might suit her too. 


Overall, I'm rather satisfied with the dress. It's part of Melody Valerie Couture's new steampunk-inspired line "Invention," and I love how the dress stays within that theme without falling prey to the stereotype that everything steampunk must be copper and smothered in gears. I tried to give the skirt layers more definition by cutting them out separately and gluing them together, and I think it made a real difference in the dress's realism. The little chains are a bit hard to see, so perhaps I'll trace around them in pencil.  

Making this dress was so fun, and a real insight into new methods of outfit construction. I will definitely use the cutting and pasting method in the future!

Who do you think wore the dress best?

Thursday, October 3, 2013

Temporary Separation

Since I got a few questions about my absence, I thought I would let you know what's going on so you don't think I've disappeared off the face of the earth. 

Essentially, the issue is this: I can't devote the time I would like to Paper Doll World. As much as I love working on paper doll items and this site, I also have many responsibilities in my life outside my computer. I'm also really busy with my next big paper doll project, which as of now is still a secret (though I can't wait to share it with you!)  My personal life has become extremely stressful, leaving me little time to accomplish my daily tasks, let alone make paper doll items.

Can't wait until I have time to make the new Patience dolls from Wilde Imagination!
I'm not planning to abandon Paper Doll World, but posting will be a little spotty until early to mid-November. I'll post whenever I can, and hopefully I'll be able to share some sneak peeks of my project, but don't expect solid twice a week posting for a few weeks.

Thank you for your patience and support. Hope to be back soon!

Tuesday, September 24, 2013

Dollhouse Part 2.1 - Vanity

In keeping with the furniture tutorial theme, here is a how-to for making a paper vanity for your dolls.


Sketch out the shape of the vanity.


Add details to make it more realistic. I made a hand towel and mirror, but you can put in whatever you like. 


Measure your sink and cabinet space, like in the kitchen tutorial, to make storage areas and places for your dolls to wash up.


Color it, cut it out, assemble it, and you're done! I decided to make mine a hanging wall unit, so it could work for dolls of different sizes. In addition to the towel and mirror, I made some nail polish, a blow dryer, and a curling iron for some more realism. 


Even with all the little parts, this project was really easy and fun to do. If you make it, please send me photos - I would love to see your creative interpretations. 

Next week's tutorial will most likely be a bathtub, but I'm always open to suggestions. If there's any tutorial you want, let me know in the comments and I'll try to make it happen.

Sunday, September 22, 2013

Formal Introduction - The Name At Last!

Careful readers may have caught her name last week, but today I want to formally introduce the doll that has been unnamed for over two weeks. Ladies and gentlemen, the one and only Miss Rani Taliesin!


Rani is a Hindi name meaning "queen," and Taliesin (pronounced tah-lee-EH-sin) is a Welsh name meaning "shining brow." Taliesin was also the name of architect Frank Lloyd Wright's studio/school, which still exists today. 


Her coloring is nice because it works with almost anything. I tried to create a doll with a darker skin tone to add some diversity to the group, but I ended up smudging her face so I had to go lighter. Someday I'll develop a more efficient coloring technique.


One of my favorite things about Rani is her expression. You can catch her looking concerned, serene, or skeptical. I love photographing her and seeing how her expression changes in each photo.


I'm very grateful for all your name suggestions. They were all great and I had the worst time deciding between them. Thanks for being such fantastic readers!

Related Posts Plugin for WordPress, Blogger...