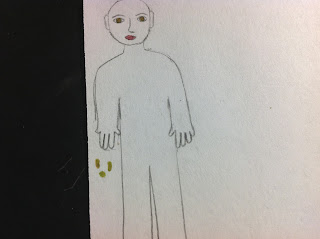
In this step, we'll color the doll in and cut it out. You'll need markers, colored pencils or crayons, and scissors for this step of the tutorial.
Tip 1: The secret to getting the right color is blending. Never actually test colors on the doll unless you don't mind drawing a new one if you don't like the way it looks. This applies for both eyes and skin tones.
2: The secret to blending colors with markers is to let the paper dry between layers of color. That way the color doesn't get too dark too early, and mixes properly.
In this case, I started with green eyes and slowly added brown. Here's the doll with only green eyes.
Here it is with one layer of brown. It's almost identical to the picture above, but it will change after a few more layers.
Five layers later, the difference is clear and I'm satisfied with the look. However, you can also color around the eye to give the appearance of cosmetics.
3: You can vary the color you use depending on the look you want to achieve - pale pink for a makeup-free mouth, or red for the effect of lipstick. It's all up to you.
When you are satisfied with how your doll looks, cut it out. Next week I'll show you a trick I discovered to preserving the dolls' appearances so the pencil and color don't get faded or ruined by liquid.


What doll are you making?
ReplyDeleteShe's based on MYAG 44.
DeleteCan't wait to see her!!!
ReplyDeleteAlso, how are you doing her skin?
ReplyDeleteWhat do you mean?
DeleteI noticed that all of your other dolls have plain white skin colored by the paper. The doll that you are basing her off of has colored (not white) skin.
ReplyDeleteI used a crayon to get the right skin tone. I don't intend to be racist by having a collection of white dolls; coloring the skin is tricky because it can cause the pencil marks on the face to smear and I don't want to risk ruining the face, but in this case the risk paid off.
DeleteI have all white dolls as well for the same reason.
ReplyDeleteI can't wait for tomorrow? Are you going to finish it then? Also, please add itt to your tutorials section.
ReplyDelete