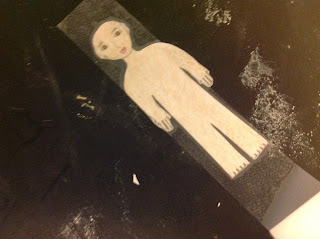
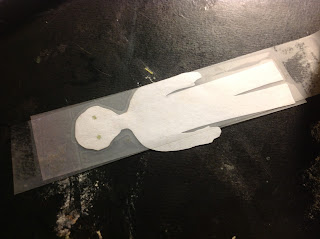
Unroll some of the tape from the roll and carefully stick your doll face down, trying to get as much of the body as possible on the tape. It's okay if some of it sticks out.
Next, cut the tape from the roll. You can cut off the excess tape if you want, but it's not necessary. Press all over the tape to make sure it sticks well, but make sure you don't crease it or create air bubbles. Repeat the process on the other side of the doll.
When both sides have been taped, cut out the doll.
Now your doll is water resistant (but not waterproof, so be careful!) and less likely to tear during play. The one downside is that now you can't change any part of the doll's face or body, so it's best to correct any problems before you tape the doll.
Don't forget to enter the contest!


I've done this technique before. Anyways, do you only tape laminate it when it's a doll or with everything?
ReplyDeleteOnly the really important things, like dolls or their pets. I feel that it's a waste of time and tape to tape laminate everything.
DeleteOkay.
DeleteP.S. I was Anonymous.
Thanks for posting this, ever since I saw this I've been doing it on mine. So far, Mina and Harper haven't had any problems, unlike when I accidentally tore Chrissa's leg off trying to remove her clothes...
ReplyDelete-NatKaya
Did her leg come off before or after you taped her?
DeleteI actually hadn't taped Chrissa, and I had been planning to change her clothes and maybe tape her... When I untaped the pants, her leg came with them. Her leg is taped back on, though, and I think I'll tape her entirely now.
Delete-NatKaya
I know how that feels - my Chrissa's head came off! I'm glad you were able to fix yours. By the way, if you want to send in some pictures, I'll publish them for Photo Shoot Sunday.
DeleteChrissa likes to break!
ReplyDelete-Anonymous A.
Lol
Delete